
How to Use Silicone Molds for Decoupage and Mixed Media

Silicone molds are wonderful tools for adding delicate three-dimensional details to handmade decorations. From elegant floral borders to vintage frames, ornamental corners and tiny decorative motifs, they can transform a simple object into a unique piece of art.
Whether you decorate wooden boxes, trays, picture frames or furniture, silicone molds offer endless creative possibilities. They work particularly well with romantic, shabby-chic, vintage and mixed-media styles.
In this guide, discover how to use silicone molds, which materials to choose, how to achieve fine details and how to incorporate your finished embellishments into decoupage projects.
1. What Are Silicone Molds?
Silicone molds are flexible forms designed to reproduce decorative shapes and textures. They are available in many designs, including flowers, leaves, ornamental frames, scrolls, lace-inspired patterns and vintage motifs.
Their flexibility makes it easier to remove a finished embellishment without damaging delicate details, provided the material has been prepared correctly.
Silicone molds are ideal for creating:
Decorative borders and corners
Floral embellishments
Vintage ornamental frames
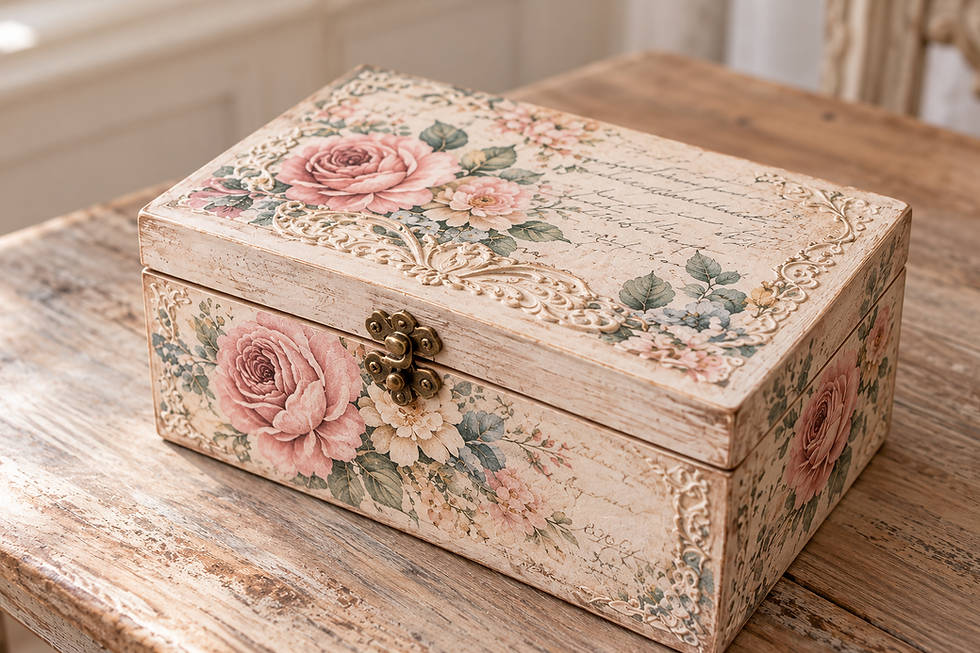
Raised details for wooden boxes
Three-dimensional accents for mixed-media artwork
When choosing a mold, consider the depth of the design, the level of detail and the type of material you plan to use.
2. Which Materials Can You Use in Silicone Molds?
The material you choose affects the flexibility, weight, strength and final appearance of your embellishment.
Air-dry clay
Air-dry clay is a popular option for decorative projects. It can capture fine details and is suitable for many ornamental designs.
Depending on the clay, the finished piece may be relatively flexible when thin or more rigid when fully dry. Follow the manufacturer's instructions for drying and removal.
Flexible modeling paste
Flexible modeling paste can be useful when you want thin embellishments that bend slightly rather than break easily. However, not every modeling paste is designed for mold casting.
Choose a product specifically suitable for silicone molds and check its recommended thickness, drying time and demolding instructions.
Plaster
Plaster can reproduce crisp decorative details and is useful for creating rigid embellishments. However, thin plaster pieces can be fragile, particularly around narrow petals, points and delicate edges.
For very fine ornaments, select a suitable fine casting plaster and test the mold before producing a complete batch.
Resin
Some casting resins can be used in compatible silicone molds to create durable decorative pieces. Different resin systems have different handling, curing and safety requirements, so follow the product instructions carefully.
Important: Not every material is suitable for every mold. Always check the compatibility of the casting material and the mold, and test a small piece before starting a larger project.
3. How to Make Decorative Embellishments with Silicone Molds
Follow these steps to create clean, detailed embellishments.
Step 1: Choose the right mold
Select a design that suits your project. Shallow molds with delicate floral details are often useful for elegant borders and small decorative accents.
For thin embellishments, look for a mold with fine details but enough space around narrow sections to allow the material to fill the shape properly.
Step 2: Prepare the mold
Make sure the mold is clean and dry. Remove dust, fibres or residue that could affect the finished surface.
Some materials may require a release agent, while others do not. Follow the instructions for your casting material and mold rather than applying a release product automatically.
Step 3: Fill the mold carefully
Press or pour the chosen material into the mold, depending on its consistency.
Work the material gently into the smallest details, paying particular attention to petals, corners and narrow ornamental lines. Avoid trapping air bubbles.
For paste or clay, a small spatula or flexible tool can help distribute the material evenly.
Step 4: Remove excess material
Carefully scrape away excess material from the back of the mold so the finished embellishment has a reasonably flat surface.
This makes it easier to attach the ornament to a wooden box, frame or other decorative object.
Step 5: Allow the material to set
Follow the manufacturer's instructions for drying or curing. Removing an embellishment too early can distort fine details or cause it to tear.
The correct timing depends on the material, the thickness of the casting and environmental conditions.
Step 6: Demold gently
Flex the silicone mold away from the embellishment rather than pulling forcefully on the ornament itself.
For very delicate pieces, work slowly around the edges and support the ornament as it is released.
Allow it to dry or cure completely if required before painting, sanding or attaching it to your project.
4. How to Make Thin and Delicate Embellishments
Thin embellishments are particularly attractive for decoupage because they can add dimension without making a decorative object look too heavy.
However, achieving a thin, flexible result depends primarily on the material you choose.
For better results:
Choose a material specifically suitable for thin mold castings.
Fill all the details evenly without leaving empty areas.
Remove excess material from the back of the mold.
Avoid extremely thin sections in narrow or fragile parts of the design.
Test the piece before demolding an entire batch.
Allow sufficient drying or curing time.
If the ornament must bend around a slightly curved surface, choose a suitable flexible material rather than assuming that a thin casting will automatically remain flexible.
For intricate designs, it is often better to make a small test piece first and adjust the material or thickness before continuing.
5. How to Attach Molded Embellishments to Decoupage Projects
Once your embellishment is ready, you can incorporate it into a wide range of decorative projects.
Wooden boxes
Add floral details to the corners, frame the lid with ornamental borders or place a small embellishment near the clasp.
For a romantic vintage look, combine raised cream-coloured details with floral rice paper and a soft, distressed finish.
Decorative trays
Use small ornamental motifs around the edges or in the corners. Keep the placement balanced so the embellishments complement the printed design.
Picture frames
Decorative mouldings can transform a simple frame into an elegant vintage accent. Choose a compatible adhesive and allow the embellishments to dry fully before painting or finishing.
Furniture and larger surfaces
Use repeated motifs to create a coordinated design on drawers, cabinet doors or decorative panels. Before applying embellishments, check that the surface preparation and adhesive are appropriate for the material and intended use.
Helpful tip: Plan the position of your embellishments before attaching them. You can place the dry pieces on the object first to test the composition and spacing.
6. How to Paint and Finish Your Embellishments
Painting can help integrate a three-dimensional ornament into the rest of your design.
For a soft vintage appearance, consider ivory, antique white, pale sage, dusty pink or muted beige. Metallic waxes and subtle highlights can emphasise raised details when used sparingly.
Depending on the casting material, you may need a primer before painting. Allow each layer to dry according to the product instructions.
For a distressed finish, apply a base colour and gently highlight selected raised areas with a contrasting colour or compatible finishing wax.
Finish the entire project with a protective coating suitable for the ornament material, paint and intended use of the object.
7. Common Mistakes to Avoid
Using an unsuitable casting material. Some materials do not reproduce fine details well or may damage the mold. Check compatibility first.
Leaving air bubbles in the design. Small bubbles can obscure fine lines and create imperfections. Work the material carefully into the mold.
Demolding too early. An ornament that has not set sufficiently may stretch, tear or lose its shape.
Pulling the ornament out by its delicate details. Flex the mold away from the casting and support fragile sections.
Making every detail too thick. Large, heavy embellishments may overpower delicate rice paper designs. Choose a size and thickness that complement the object.
Skipping the test piece. A small trial can help you determine the correct material, thickness and demolding time before you begin a larger project.
Discover Silicone Molds at ArtyDecoupage
Silicone molds make it possible to create personalised decorative details that bring character and dimension to handmade objects.
Whether you prefer delicate floral motifs, elegant vintage ornaments or more elaborate decorative borders, the right mold can become a valuable tool in your creative collection.
Explore the Silicone Molds collection at ArtyDecoupage and discover designs for your next decoupage or mixed-media project.
Combine your favourite molded embellishments with decorative rice paper, paint and carefully chosen finishing touches to create something uniquely yours.
Happy crafting!
— The ArtyDecoupage Team
Comments